| Rating: |
|
22 Ratings |
| Your rating: |
|
Sign in to rate
|
Back-Basting Applique with Inklingo
My name is Linda Franz and I love Inklingo for appliqué.
It is easier, more precise and faster because it eliminates all the tracing and special marking. Spend your time stitching, not tracing, making templates or positioning patches!
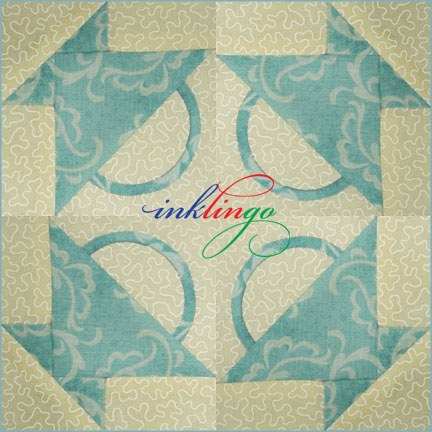
The handles on the new Basket shape collections are perfect for back-basting appliqué.
See how perfectly positioned the handles are?
ADVANTAGES OF INKLINGO BACK-BASTING
- Faster preparation for a portable project
- Perfect positioning with no shifting
- Flat, perfect results
- Colors of ink show on most dark backgrounds too
These benefits are achieved with Inklingo with
- no tracing, no light box, no overlays
- no special marking pencils
- no templates
- no pins to catch your thread
- no starch
- no glue
NOTE
In this article, you can right click on any of the images and choose "View Image" to see it full size, then click "Back" to return to the article.
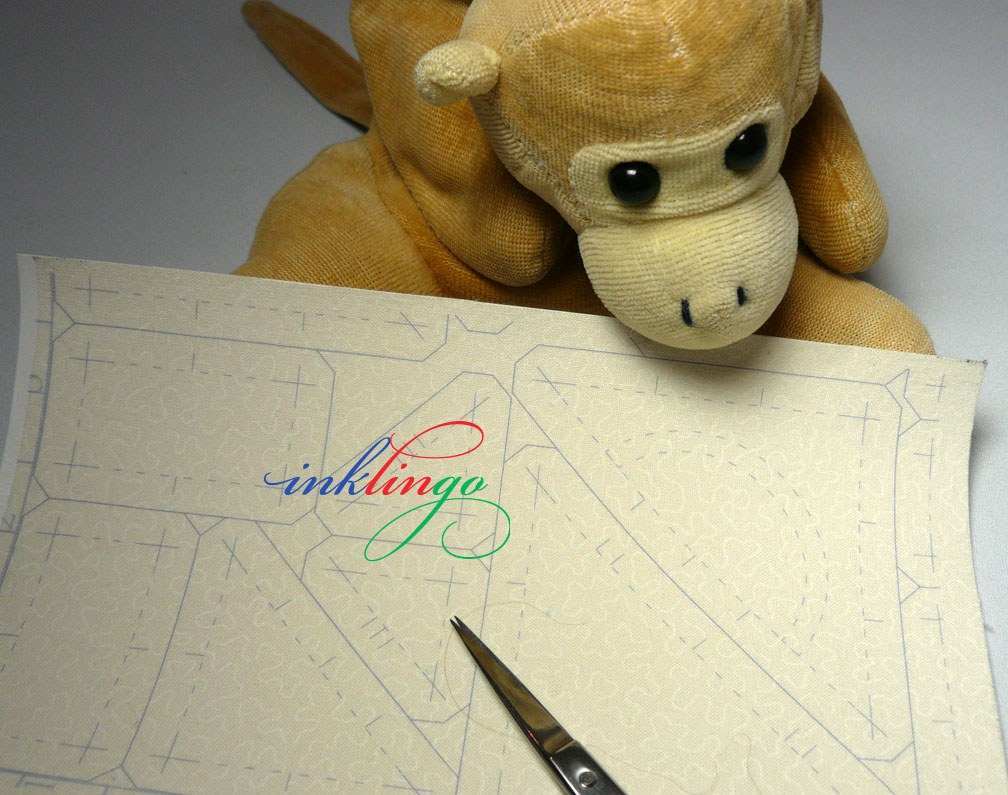
1. PRINT
Print the outline on the wrong side of the fabric with Inklingo.
For this example, I printed a Combo Layout from the 3 inch Basket shape collection.
If I can get good results with shapes this small, I can do anything!
All of the shapes for a 3 inch basket print on a scrap of fabric 4 x 6.75. I printed darker than usual for the sake of the camera. Print a sheet of a second fabric with the same Combo Layout for two mirror image blocks. There are several other Combo Layouts to choose from. This part goes fast!
2. POSITION THE PATCH ON THE FRONT
Place the patch on the front of the background.
Hold it up to the light to make sure that it covers the whole outline plus at least 1/8 to 1/4 inch all the way around for the turn-under allowance.
Double-check that the patch is right side up on the front (right side) of the background.
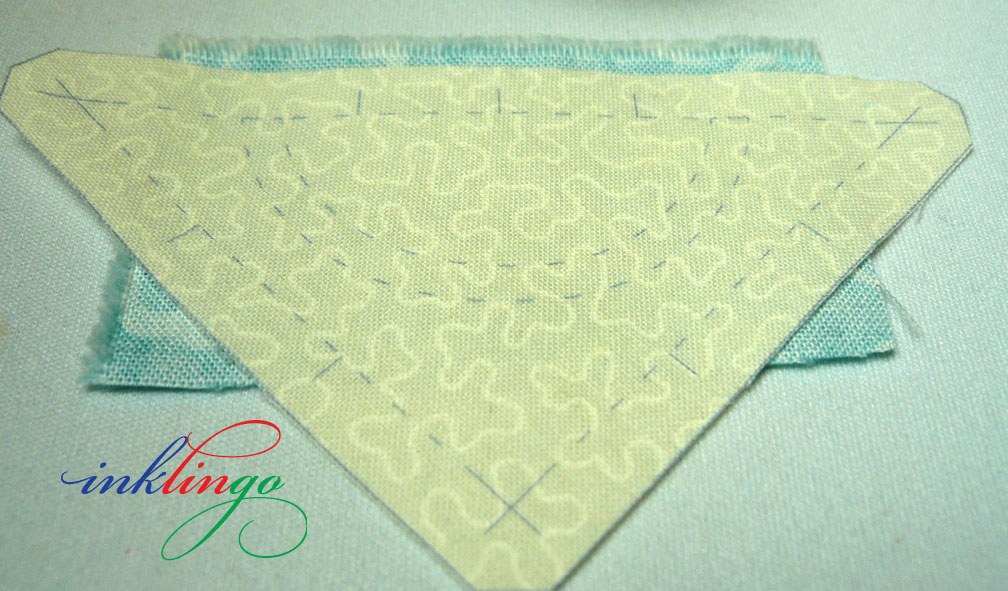
3. BASTE
Working from the back, baste along the lines. Monkey says this is why it is called "back-basting."
Basting accurately along the outline is the key. It ensures that:
- the patch will be positioned precisely
- the patch will lie flat without shifting
- the outline will be clear on the front for the next steps
- there will be perforations marking the outline when the basting is removed
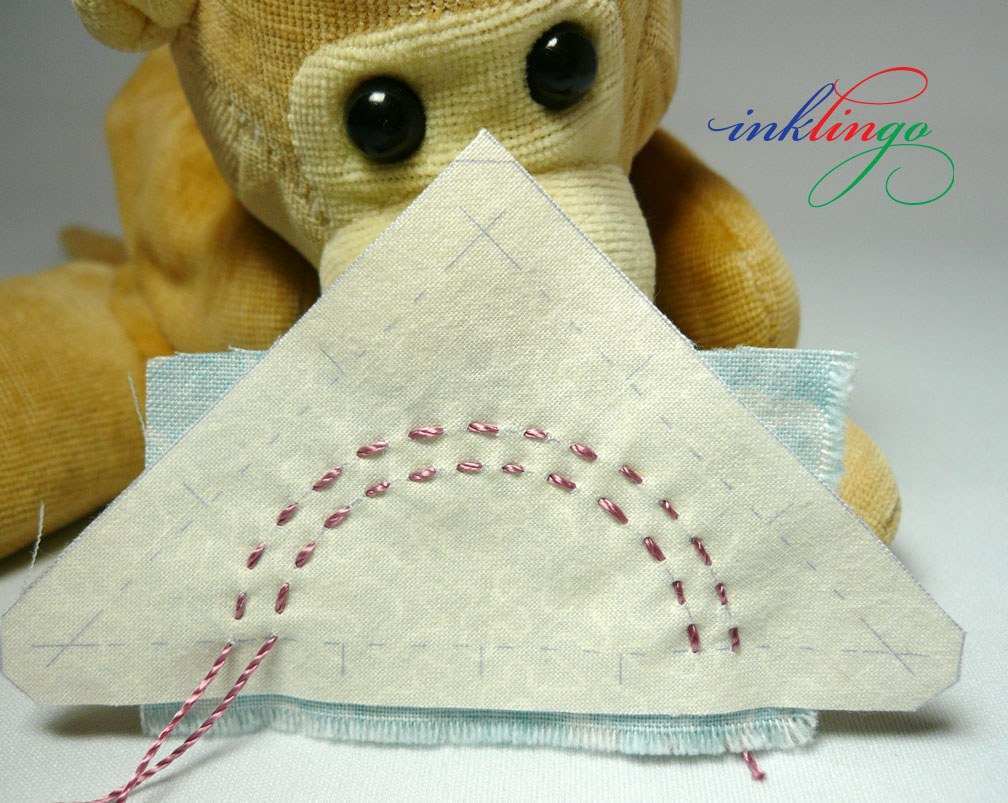
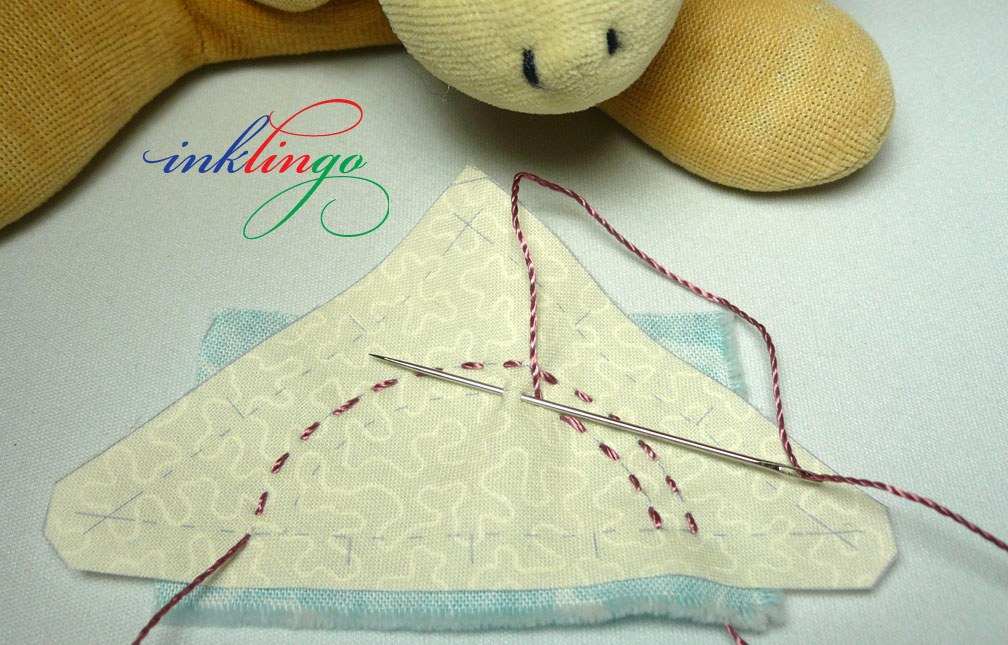
Choose a large needle and thick thread so there will be big, temporary holes in the background and the patch.
The needle goes between the fibers so it does not permanently damage the fabric.
- Consider using a contrasting thread color, so the outline is easier to see from the front for the next steps.
- Embroidery needles, darning needles and size 8 or 9 sharps work well. A large eye is an advantage.
- I used Pearle cotton in this example, but you can use several strands of embroidery floss or other bulky thread for basting.
Press the two layers together, or pin if necessary, to prevent shifting while you are basting.
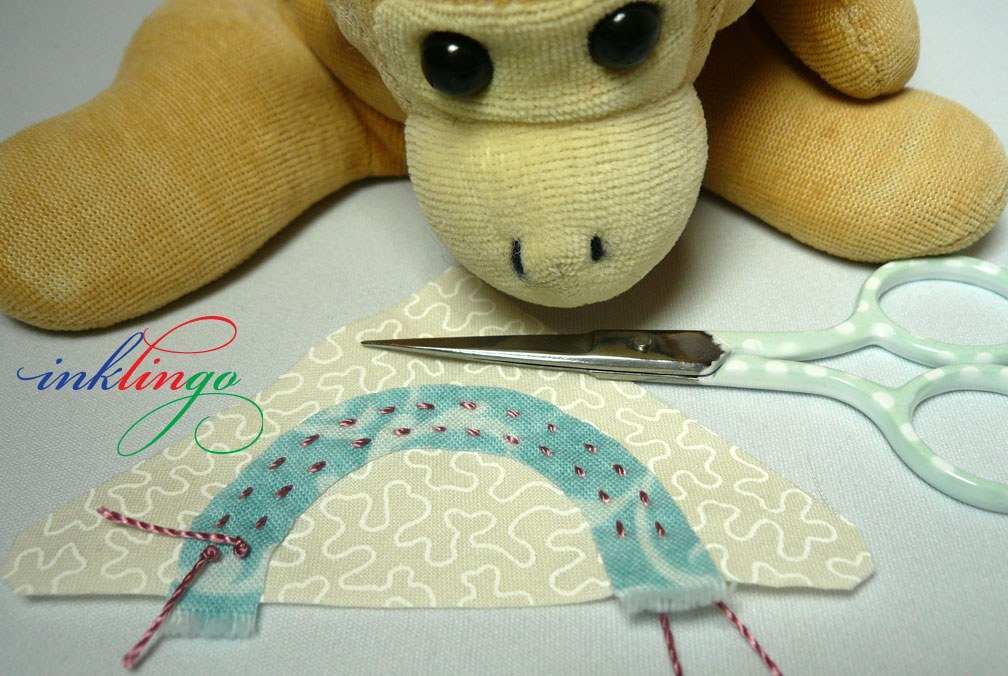
4. TRIM
Working from the front, trim the patch fabric leaving a narrow turn-under allowance outside the basting.
The turn-under should be 1/8 to 3/8 of an inch. The narrower the turn-under, the better. If the fabric frays easily, leave more-or better yet, choose another fabric!
If your turn-under allowance is a consistent width, it will be easier to judge where to turn even if the perforations are difficult to see.
Press after trimming to set the thread and the holes.
You can trim a bit at a time or all at once. I prefer to trim all of my turn-under allowances to a consistent width before I start to needleturn, but some quilters choose to trim a bit at a time in case the edge frays before it is sewn. If the fabric frays very easily, I don't use it for appliqué.
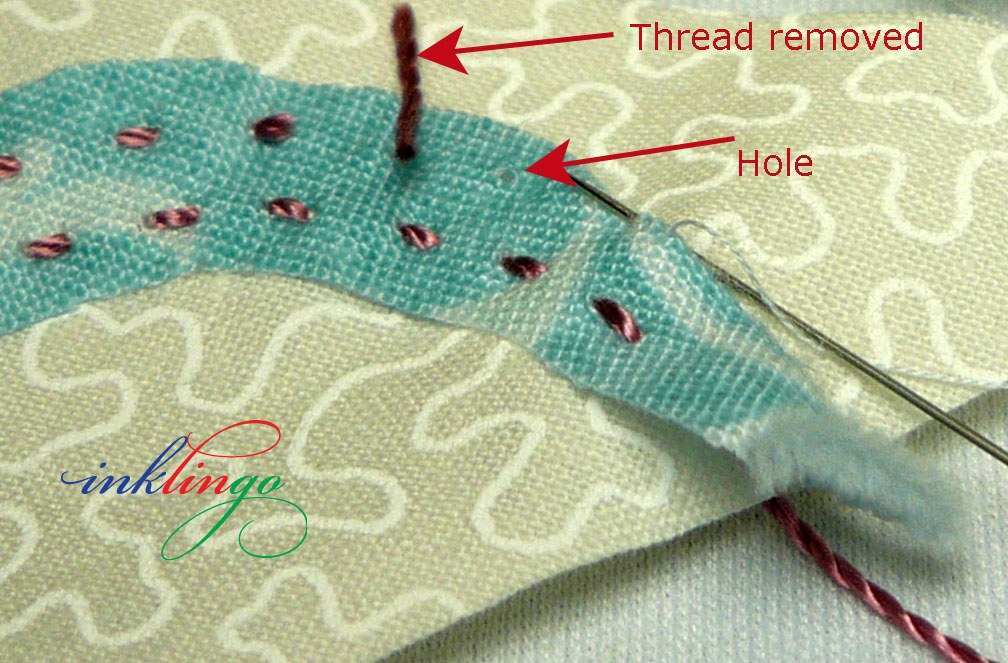
5. NEEDLETURN
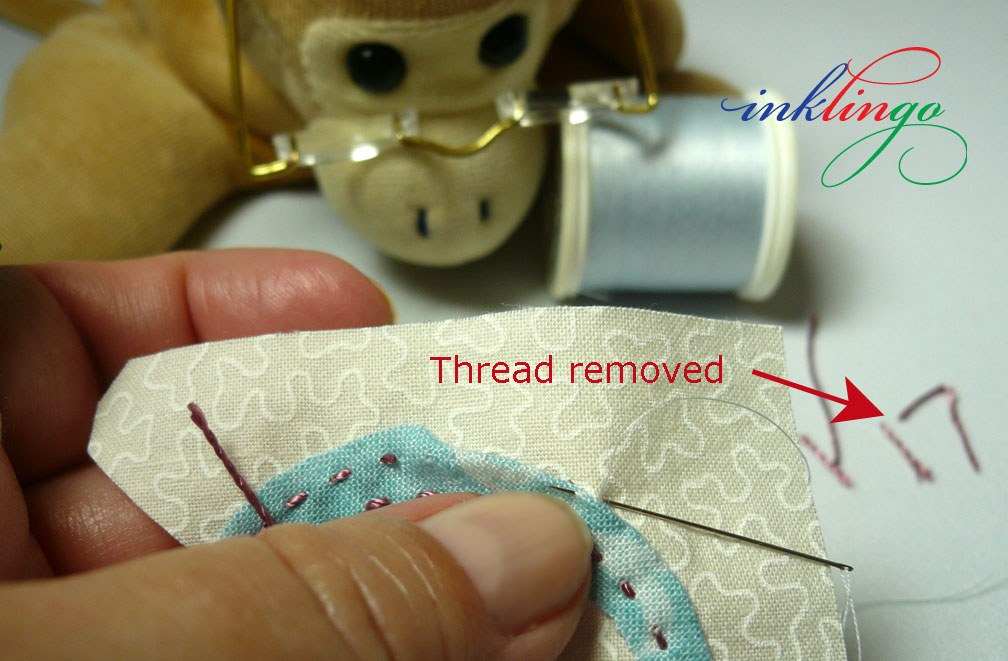
Remove only two or three basting stitches at a time.
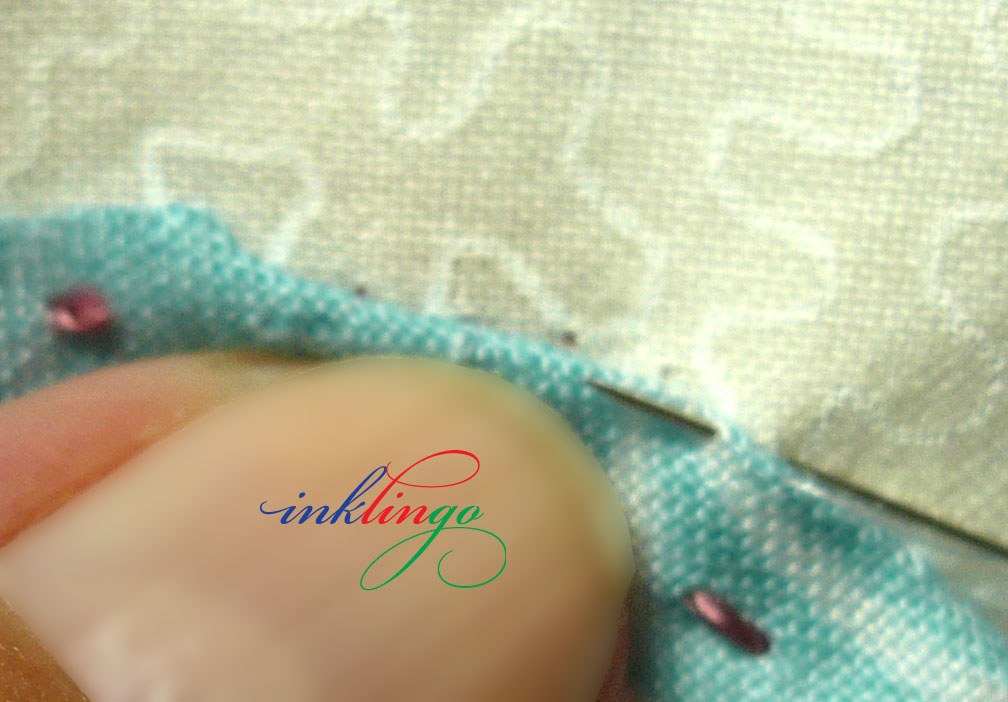
Use your needle or a moist wooden toothpick to turn under the edge and stitch it down with invisible stitches.
Remove only two or three basting stitches at a time. Lift the basting thread away with your needle or toothpick, and try not to disturb the holes that are left. If you remove too many basting stitches at a time, the patch may shift and the perforations may disappear before you can use them.
See the holes?
You have several guides to help you follow the outline:
- the holes in the background fabric
- the holes in the appliqué shape which perforate the fabric and make it easier to turn under
- a consistent turn-under allowance
- the basting thread ahead, even if you cannot see the holes in a soft fabric
- the line on the back, if you peek before pulling the needle through
- a chalk or pencil mark between the perforations on the front of the patch, if necessary
Use your favorite invisible stitch.
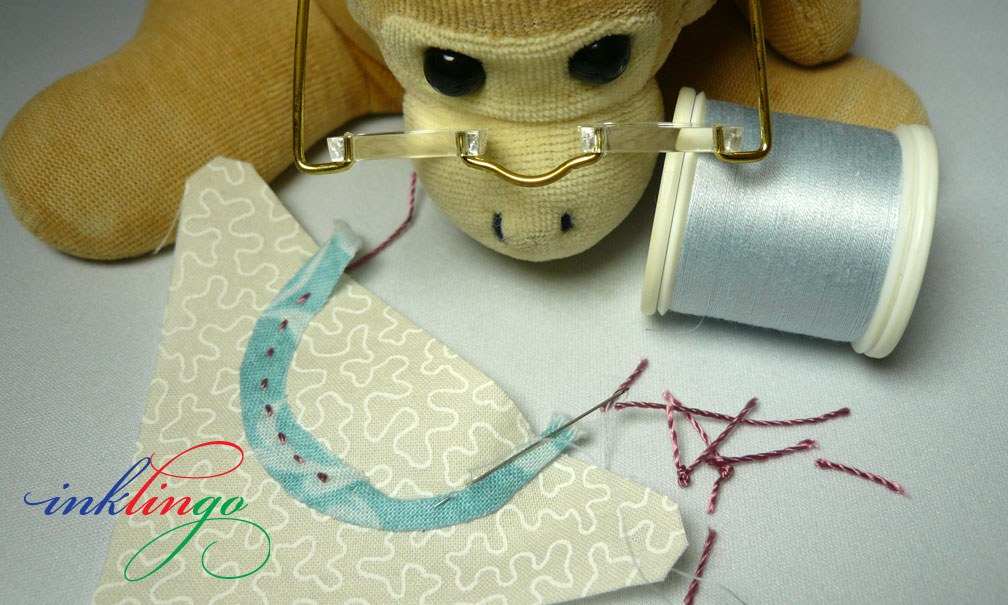
Sew the second side of the handle, too.
Markers, templates, pins, templates and glue? There are none! Hooray!
It's just you (wearing your reading glasses like Monkey) relaxing with a needle and thread, confident that you will have great results. Great results will make you want to finish whatever you start!
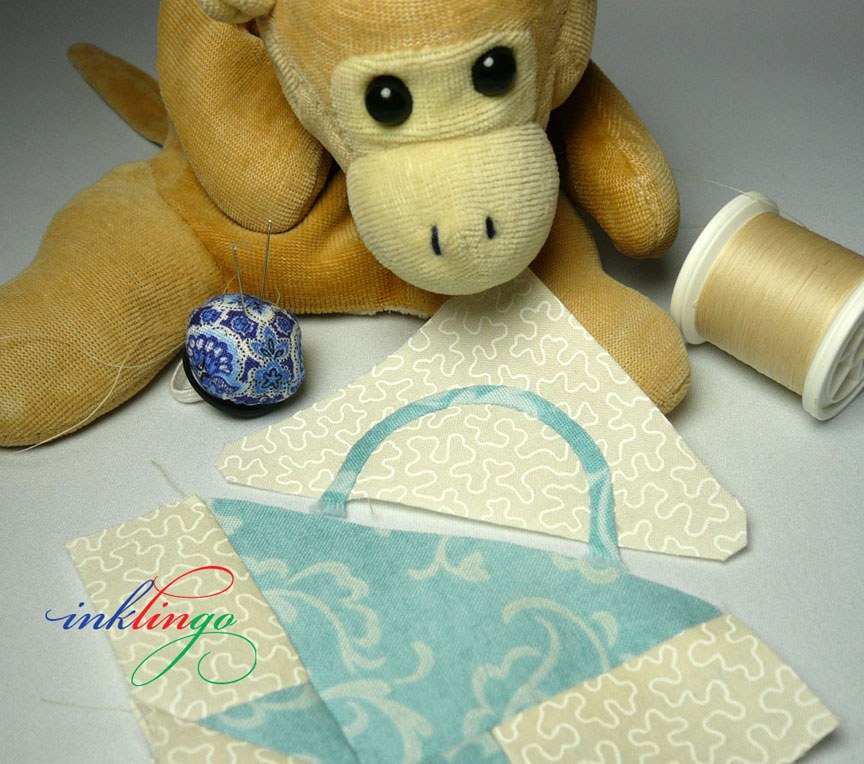
When the handle is complete, there is one more seam to add it to the rest of the basket block.
A decorated toothpick and a finger pincushion are great accessories for appliqué and piecing by hand or by machine. There is a 1 minute video on YouTube showing how to make them.
This tiny example with a 3 inch block is not for sissies, but if you can do this, you can do any size!
We think you will enjoy this so much that you will want to make a Basket Quilt. There is a wonderful Antique Basket Quilt set on point in the New England Quilt Museum. It was made by someone who did not have the advantage of Inklingo!
This quick overview should get you started, but there is a complete chapter on applique in The Inklingo Handbook. Needleturn appliqué with Inklingo is more fun because the preparation is easier and faster and the results are more precise.
BEST ASSET FOR APPLIQUÉ
Good eyesight! Appliqué with good lighting and wear reading glasses for the best results.
The thumbnail on your non-dominant hand is your best tool. It presses the edge ahead of your needle and protects the shape when you tighten the thread.

INTRIGUED BY INKLINGO? TRY IT FREE !
Quick Start Guide > Order the FREE shapes, download, and start printing!
The beauty of learning how to print on fabric is that it works for everything-appliqué, triangles, hexagons, Double Wedding Ring, Storm At Sea, Joseph's Coat, and other designs.
The Index of Shapes and the Smart Shopper's Idea Book under the Support tab should keep you inspired.
- Cut along a line (no measuring, no templates)
- Sew along a line (precise, easy) by hand
- Print on scraps and strips (use fabric efficiently)
- Chain piece by machine
- Use scissors OR a rotary cutter
You can search for Franz or Inklingo to find more articles on QuiltingHub and there are more to come.
If you enjoyed this article, please log in and "like" it. Thank you for visiting!
Check This Out!
Check out the most popular tool on QuiltingHub. Use the search 'Map Of Resources' or the 'Resources Trip Planner' to the right (or below).
Glossary
- Applique
-
Attaching individual pieces of fabric to a background to form a design.
Same As: Appliqué
See Also: Freezer Paper Applique, Needleturn Applique, Machine Applique, Reverse Applique, Shadow Applique
- Appliqué
-
Attaching individual pieces of fabric to a background to form a design.
Same As: Applique
- Background Fabric
-
The fabric used as the background when placing Applique pieces.
- Basting
-
A temporary method of holding the quilt Sandwich layers together while you finish assembling it. This can be conducted using Basting Sprays, pins, clips or temporary stitching called a Tacking Stitch or Basting Stitch.
- Block
-
The basic unit of a quilt top, usually square but can be rectangular or other shapes. Blocks can be pieced, appliqued or plain.
- Double Wedding Ring
-
Arced pieces of squares sewn together to form interlocking rings or circles.
- On Point
-
A Block arrangement in which a block is placed with its corners up and down and to the sides.
- Patch
-
An individual fabric shape joined with other patches to make a quilt block or sometimes a one patch style quilt. These may be cut from templates, rotary cut or free hand cut.
Same As: Piece
See Also: Double Nine Patch, Four Patch Block, Nine Patch, One Patch
- Piecing
-
The process of assembling quilt blocks from pieces of fabric sewn along their edges to form a whole.
See Also: English Paper Piecing, Assembly Piecing, Machine Piecing, Chain Piecing, Paper Piecing, Hand Piecing
- Press
-
Method of using an iron to press seams and blocks. This means simply pressing downwards on the seam with the iron from above and not moving the iron back and forth which can distort the block or seam.
- Rotary Cutter
-
A very sharp tool that looks like a pizza wheel which is capable of cutting through multiple layers of fabric.
- Sharps
-
Ultra sharp, thin needles used for piecing and doing applique.