Applique Tutorial: Machine and Raw Applique
Summary
Appliqué can make your quilts come alive. Read this amazing tutorial on how to do machine appliqué and raw appliqué. Share it with all your friends.
Share This Page With Others!
| Rating: |
|
Not enough ratings.
|
| Your rating: |
|
Sign in to rate
|
Applique Tutorial: Machine and Raw Applique
This type of appliqué is a fun technique to finish off the edges of appliqué designs using your home sewing machine. This is also a great way to use some of those pretty stitch designs that many of you have on your machines.
Listed below are two often used techniques in machine appliqué: Machine Appliqué and Raw Edge Appliqué. First, let's look over some basics that all appliqué techniques use – whether it's hand or machine appliqué.
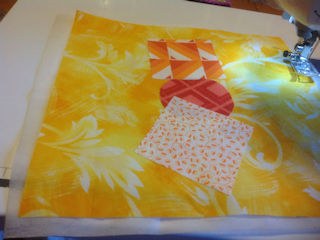
- You will want to add about 1" around all sides of the unfinished background block. This is because the background fabric often becomes wonky when you are appliquéing. You will then trim the block to size after you are finished with the appliqué.
- Appliqué shapes do not always allow for a seam allowance.
- To find the center of your background piece – simply fold your fabric piece in half and finger press the center fold firmly. Fold the fabric in half yet again, and finger press the center fold. Now open your block up to see that you have a 'plus-sign' in the middle of your square which is the center of your block.
- Obtaining a light box to use for appliqué projects is much easier than using a kitchen window! Use the light box to lightly trace your layout pattern onto the background fabric. I use a water erasable pen for this. But I also find that a fine-pointed fabric pencil works well too.
- You will always start working on the appliqué pieces that are at the 'back' layer of your design and work to the topmost layer. You do not need to appliqué those pieces of appliqué that will be covered (or overlapped) by another appliqué piece.
You will need your basic sewing
notions, plus a light-weight
fusible and a light-weight to medium-weight tear-away stabilizer. The
fusible is to fuse your
appliqué pieces to the
background fabric prior to stitching, and the stabilizer is used to keep the entire
block nice and smooth while stitching. Using a stabilizer keeps your
block from puckering or getting chewed up in your feed-dogs. Stabilizers come in many types – tear-away, wash-out, and cut away. I'm a simple soul and use the tear-away.
- Follow the manufacturer's direction to copy the appliqué shapes onto the fusible paper, and then to fuse the shapes to the wrong side of the fabrics. *Remember to check the pattern instructions to see if the shapes need to be copied in reverse! Cut out the appliqué shapes ON the drawn line.
- You can use most any type of thread for machine appliqué. Rayon thread will give the design a shiny look, while basic sewing thread will have a matte look. Fill your bobbin with coordinating thread. You can use invisible thread if you choose. Keep in mind that some sewing machines just don't like invisible thread on the spool and the bobbin at the same time.
- You will need to practice on a scrap piece of fabric to find the best zig-zag (or satin stitch) setting for you. Your sewing machine manual should give you some advice. Usually a machine appliquéd piece has nice tight spacing and a short width.
- You do not always have to use the satin-stitch for your machine appliqué! You can use the always popular blanket-stitch or any one of the stitches your personal sewing machine might offer.
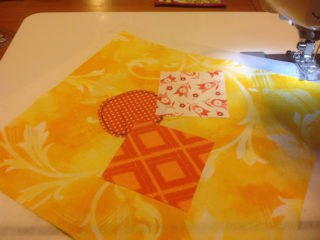
- Follow the design of the pattern on your background piece and fuse all of your appliqué shapes in place. Coordinate your thread color to the appliqué shape fabric color. You will begin stitching your design in place with the deepest buried appliqué shape on the block. Only stitch the areas around the shape that will be visible. You do not need to stitch down any areas of the shape that will be (or are) covered by another shape. Note* – Some quilters sew down one shape at a time. This is totally optional, but the sewer has a tendency to sew around each appliqué shape in its entirety, forgetting the need to not stitch in overlapping areas.

- When you come to an inner corner, you will need to stitch just beyond the corner and stop sewing. Place your needle in the down position in the fabric as it comes to the left side of the stitch. Now pivot your whole block so that you can continue to stitch.
- When you come to an outer corner, you will need to stitch just to the point of the corner and stop sewing. Place your needle in the down position in the fabric as it comes to the right side of the stitch. The needle will be sitting at the point of the corner. Raise your pressure foot and pivot the whole block so that you can continue to stitch.
- Continue stitching with your chosen stitch design until all of the appliqué shapes are in place. Give the quilt block a good press, and trim your block to the given size.
This type of machine appliqué gives your project a quaint, playful, and even a folk-art look. This look is perfect for use on homespun fabric and even wool.
- Follow the manufacturer's direction to copy the appliqué shapes onto the fusible paper, and then to fuse the shapes to the wrong side of the fabrics. *Remember to check the pattern instructions to see if the shapes need to be copied in reverse! Cut the appliqué shapes out ON the drawn line.
- You can use most any type of thread for machine appliqué. Rayon thread will give the design a shiny look, while basic sewing thread will have a matte look. Fill your bobbin with coordinating thread. You can use invisible thread if you choose. Keep in mind that some sewing machines just don't like invisible thread on the spool and the bobbin at the same time.
- For this step you will practice straight stitching on a scrap of fabric so that you can find a nice stitch length that you prefer for the project you are doing. You'll want a smaller stitch length for working on cotton fabric. Lengthen your stitch when working on wool as it is a bit thick and a longer stitch length eliminates bunching.
- For Raw Edge stitching you will be stitching close to the edge of each appliqué piece only. You will not be covering up the raw edges of any shape.

- Follow the design of the pattern on your background piece and fuse all of your appliqué shapes in place. Coordinate your thread color to the appliqué shape fabric color. You will begin stitching your shapes in place with the deepest buried appliqué shape on the block.
- Continue stitching with your chosen stitch design until all of the appliqué shapes are in place. Give the quilt block a good press, and trim your block to the given size.
Check This Out!
Check out the most popular tool on QuiltingHub. Use the search 'Map Of Resources' or the 'Resources Trip Planner' to the right (or below).
Glossary
- Appliqué
-
Attaching individual pieces of fabric to a background to form a design.
Same As: Applique
- Background Fabric
-
The fabric used as the background when placing Applique pieces.
- Block
-
The basic unit of a quilt top, usually square but can be rectangular or other shapes. Blocks can be pieced, appliqued or plain.
- Bobbin
-
A spool or reel that holds thread or yarn for spinning, weaving, knitting, sewing, or making lace.
-
Accessories that are available for sewing machines and are especially made for quilting.
- Fusible
-
Various webs or interfacings which can be ironed onto a fabric for easier applique or to support the fabric.
- Homespun
-
A fabric woven with colored threads instead of printing the fabric after it is woven. Homespun fabric is generally plaid and looks the same on the front as it does on the back. Named for its French inventor, Joseph M. Jacquard.
Same As: Jacquard
- Invisible Thread
-
Nearly invisible thread.
Same As: Monofilament Thread
- Notions
-
Small sewing supplies such as pins, scissors, rulers, seam ripper, and so on.
- Pivot
-
Turning your fabric while the sewing machine needle is still in the fabric.
- Press
-
Method of using an iron to press seams and blocks. This means simply pressing downwards on the seam with the iron from above and not moving the iron back and forth which can distort the block or seam.
- Raw Edge
-
An unfinished fabric edge of a piece of fabric or a quilt block. For applique, an edge which has not yet been turned under with stitching.
- Seam Allowance
-
The width of fabric left to the right of a sewn seam. In quilting this is traditionally 1/4 inch. For sewing garments it is usually 5/8 inch.