| Rating: |
|
13 Ratings |
| Your rating: |
|
Sign in to rate
|
Universal Templates from FP - The best templates ever!
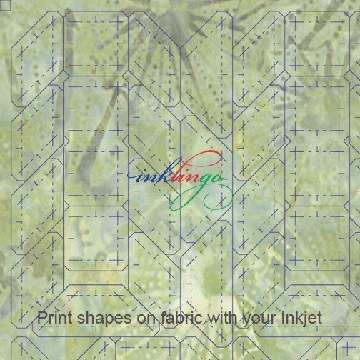
My first choice is always to print the shapes on fabric with Inklingo and an Inkjet printer.
It is faster, easier and more accurate than using any kind of template.
However, there are some situations where templates make sense, and FP templates are my favorites!
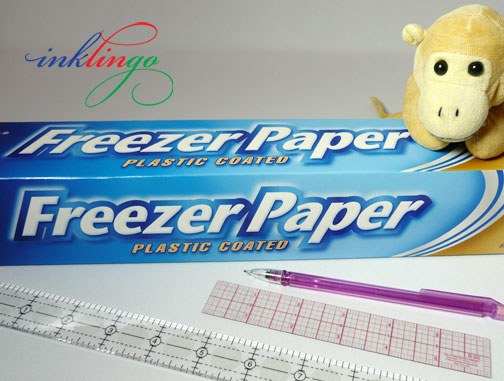
FP is short for Freezer Paper! We love it.
It surprises me how many quilters are not familiar with the advantages of using freezer paper instead of acrylic templates. FP gives you more benefits than acrylic without any of the downside!
There are MANY advantages of using FP instead of acrylic---but it would be enough for me if the only advantage was that FP makes quilting more accessible to more people.
WHY TEMPLATES?
There are some situations when templates make sense.
* Fussy cutting when you don’t have enough fabric to print identical sheets for Inklingo No Waste Fussy Cutting.
* Using tiny scraps or pre-cut strips, too small even for the tips in the Top Ten Tutes.
* Cutting huge shapes that are too big for your printer.
* Using fabrics which are too dark on the wrong side to print easily even with the tips for dark fabric in Top Ten Tutes.
WHY UNIVERSAL?
If you can trace it, draw it, or print it on FP, you have a template.
It can be the front of a blouse or an applique design or any shape at all.
It can have seam allowances of any width or no seam allowances at all.
It can be a normal template or a window template.
There are no limits. Freezer paper does it all!
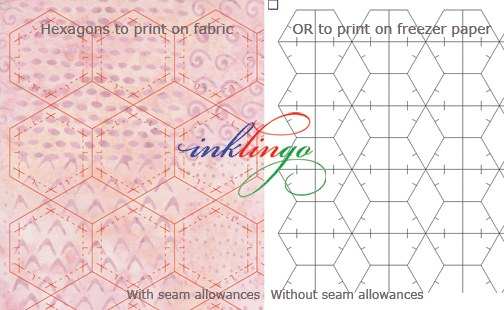
Inklingo shape collections include shapes with seam allowances to print on fabric and shapes without seam allowances to print for templates.
WHY WE PREFER FREEZER PAPER FOR TEMPLATES
There are at least NINE reasons why I prefer FP instead of acrylic. These are my top three:
1. Freezer paper is inexpensive and readily available---no waiting for delivery or paying for shipping.
Even if you have to order FP online, you get a lot of FP for your shipping dollar, so you can always have it on hand. It is much less expensive than acrylic.
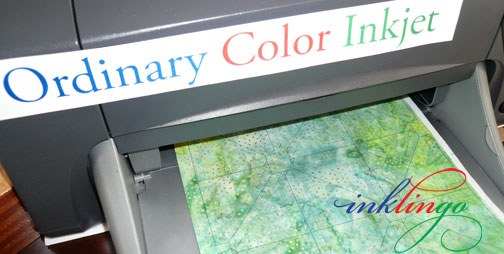
2. Freezer paper is easy to print with any ordinary Inkjet printer, so it works perfectly for ANY shape you can print or draw and you can print as many as you need quickly. Freezer paper is versatile because it is easy to customize or cut partial shapes too.
3. Freezer paper templates are ideal for cutting several layers at a time with scissors or a rotary cutter and there is no need to mark the cutting line on the fabric.
Reasons 4 to 9 are in another article on the All About Inklingo blog.
TEMPLATE TIPS
Quilted Diamonds (2002) and Quilted Diamonds 2 (2004) were my first two books---pre-Inklingo. They teach piecing with freezer paper templates. It is the easiest, most flexible template technique and also the least expensive. If I need templates, I use FP, not acrylic.
As you know, I prefer printing the shapes on fabric, but when I need templates there are a few things that make it easy.
These are my top ten tips for using FP templates.
1. Take the curl out!
If you are using FP on a roll, the curl can be annoying. Some quilters store sheets of FP under books to flatten it. A faster way is to iron FP to the ironing board cover and peel it off. Quick and easy. It removes the curl and it doesn’t “use it up” because FP can be used over and over again.
2. Trace or print the shapes onto FP.
If your printer doesn’t feed light-weight FP sheets well, you can iron the leading edge to a sheet of regular paper (just the first 0.25 inch or so) and feed the two layers through together. With the right amount of heat (no steam), the FP will peel off neatly after printing.
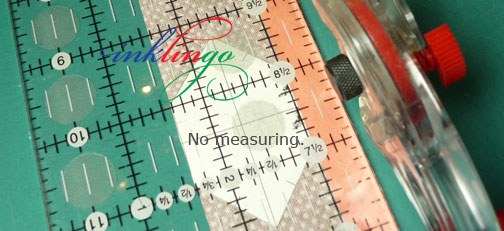
3. Rotary cut the freezer paper.
There is no measuring, so you can use any acrylic ruler as a straight edge. Cut several layers at a time if you need hundreds of templates like hexagons. You might want to designate one cutter just for cutting paper. (I use the same one I use for cutting fabric.)
4. Pre-cut strips of fabric to the right size.
If you are cutting several of one shape, like squares or hexagons, it is efficient to cut the fabric into strips first.
A strip of colored paper 0.5 inches wide is a handy tool. It allows for two 0.25 inch seam allowances, if you are adding seam allowances when you cut.
You can determine the correct width without measuring or math. Just position the template with correct straight grain and allow for two seam allowances (the width of the orange paper), as shown.
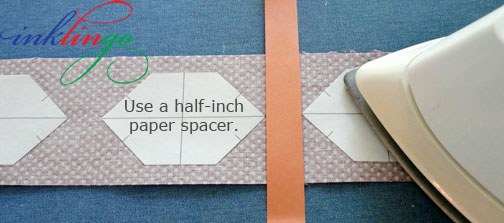
5. Space the templates exactly 0.5 inch apart.
Accurate spacing saves fabric and eliminates extra cuts.
Press the templates in position on the wrong side of the fabric with a hot, dry iron. The plastic coated side of the FP sticks to the fabric with a temporary bond.
With the right amount of heat, the templates will stick securely but still peel off easily enough to be used over and over and over again. Acrylic templates slip and slide.
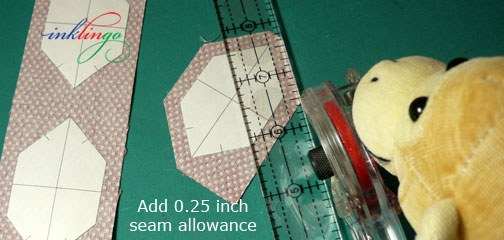
6. Add the 0.25 inch seam allowance when you rotary cut.
There is no need to draw the cutting lines whether you use a rotary cutter or scissors.
You can use a wider or narrower seam allowance if you prefer.
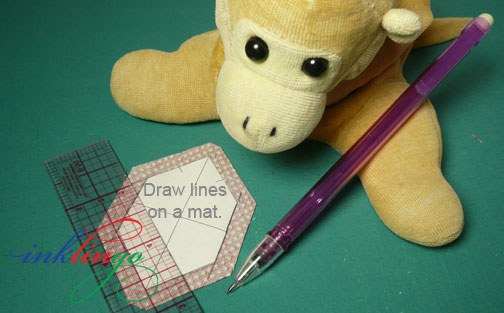
7. Extend the pencil lines beyond the freezer paper for crosshairs.
The crosshairs make everything easy. With crosshairs, you know where to pin and where to start and stop sewing, especially for inset seams or any time you are hand sewing. (Of course you can sew these shapes by machine if you prefer.)
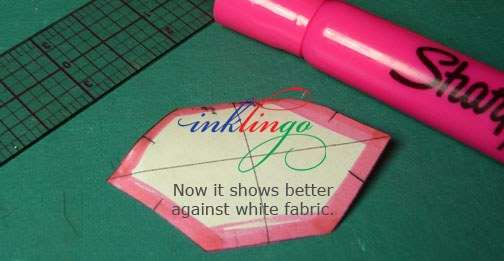
8. Make the FP contrast with the fabric, if necessary.
If it is hard to see the edge of a white FP template against a light or white fabric, run a highlighter around the edge first to make it easier to see.
9. Nest shapes to use fabric efficiently.
When you are positioning the FP for several different shapes on the same fabric, you will want to nest the shapes to avoid waste. Review the Inklingo Combo layouts in the shape collection for ideas.
For example, there are 7 different combo layouts in each of the three InklingoCastle Wall shape collections.
10. Make notes on your templates!
One of the many lovely things about FP templates is that you can write on them.
straight grain
which fabric to use
numbers for sewing sequence
which side is “up”?
pattern name
haiku and other poems?
date?
When I teach using FP templates, there are more tips and tricks. I have summarized them on the All About Inklingo blog. Some of them apply to acrylic templates too.
FP templates set me free to be creative, and I would rather spend on fabric than on acrylic! I think many quilters would agree.
Now you know why I think FP templates are the best templates ever!
Check This Out!
Check out the most popular tool on QuiltingHub. Use the search 'Map Of Resources' or the 'Resources Trip Planner' to the right (or below).
Glossary
- Applique
-
Attaching individual pieces of fabric to a background to form a design.
Same As: Appliqué
See Also: Freezer Paper Applique, Needleturn Applique, Machine Applique, Reverse Applique, Shadow Applique
- Cutter
-
A quilt that is so badly damaged or worn that it's only purpose now is to be cut up for other craft projects.
- Grain
-
The lengthwise and crosswise threads (warp and weft directions) of a woven fabric.
- Ironing
-
Moving a hot iron while it has contact with fabric. Often ironing can stretch and distort fabrics and seams. A better alternative is to press, where you just lay the hot iron down and lift straight up from the fabric.
See Also: Pressing
- Piecing
-
The process of assembling quilt blocks from pieces of fabric sewn along their edges to form a whole.
See Also: English Paper Piecing, Assembly Piecing, Machine Piecing, Chain Piecing, Paper Piecing, Hand Piecing
- Press
-
Method of using an iron to press seams and blocks. This means simply pressing downwards on the seam with the iron from above and not moving the iron back and forth which can distort the block or seam.
- Rotary Cutter
-
A very sharp tool that looks like a pizza wheel which is capable of cutting through multiple layers of fabric.
- Ruler
-
A heavy plastic measuring guide that can come in a variety of shapes and sizes.
- Seam Allowance
-
The width of fabric left to the right of a sewn seam. In quilting this is traditionally 1/4 inch. For sewing garments it is usually 5/8 inch.
- Strip
-
A construction technique in which long, narrow pieces of cloth are joined lengthwise, sometimes with long rows of quilt blocks, to form a quilt top. The term "strip" can be used to describe the long pieces of fabric between blocks (see Sashing) or to describe the small, narrow remnants used in string patchwork.
See Also: Sashing
- Template
-
Pattern pieces made out of paper, cardboard, plastic or metal, giving you something to draw around so that you can accurately replicate any shape.